This is the second post in a series on making your own sourdough bread. Last week, Jillian explained why make your own sourdough – from health benefits to taste.
Sourdough Update: I have a LIVE STARTER!!
Forgive me for my over-enthusiasm, but I had been somewhat skeptical that I’d be able to get my starter going…but I did it! So now, as planned, I’m going to tell you what I did, how I did it, and also some of my notable observations, so you can try it yourself if you’d like.
To begin, as I mentioned in my initial post about this sourdough experiment, I had come across a few different recipes for starters, including one similar to that of San Francisco’s renowned Tartine Bakery. I ultimately decided that Tartine’s was the method I wanted to try to use, partly because the supply list was short and uncomplicated, and partly because I came across a fantastic tutorial that not only explained things in a very dumbed-down, easy-for-anyone-to-understand kind of way, but also included pictures (I’ve included the link at the end of this article). Here, for you, is my version.
First of all, as I mentioned, I needed very few supplies in order to attempt this sourdough experiment (read: there is very little personal or financial commitment/loss if it doesn’t work out). I simply needed clean water, rye flour, a small glass jar (I used a pint-sized mason jar), and a kitchen scale (yes, the kitchen scale really is necessary, as it turns out).
Water: Because our tap water generally contains chlorine and other additives, it is best to use pure bottled water, especially when you’re getting your starter going. This will ensure that your culture is free of impurities and there is no chlorine around to kill the organisms you’re trying to grow.
Rye Flour: Also, although you can use several types of flour to start and maintain your sourdough starter (all-purpose, whole wheat, etc.), using rye flour may be your best bet. The reason for this is that rye flour contains a wealth of nutrients, especially compared to white flour, which means it will be easier to get the starter going because the starter will have more nutrients to feed on. For this same reason, using rye flour means there will be less pressure on you when it comes to remembering to feed your starter — you can forget for a day or two and you won’t kill your culture because of the extra nutrients available for the bacteria to feed on. Less stressful for sure!
Yeast: As for the yeast, there is no need to add any to your starter culture, because you’re actually trying to capture the wild yeast that is already hanging out in your kitchen, so all you really need to do was trap it!
 Check out those air bubbles! That means the starter is alive.
So here’s what I did…
Day one: I started by weighing my empty jar (this would come in handy later), and writing the weight on the bottom of the jar with a Sharpie. Next, I set my empty jar back on the scale and tared the scale to zero. I added 50g of clean water (I used some inexpensive bottled water I bought from Whole Foods), followed by 50g of rye flour — making 100g total weight to start out.
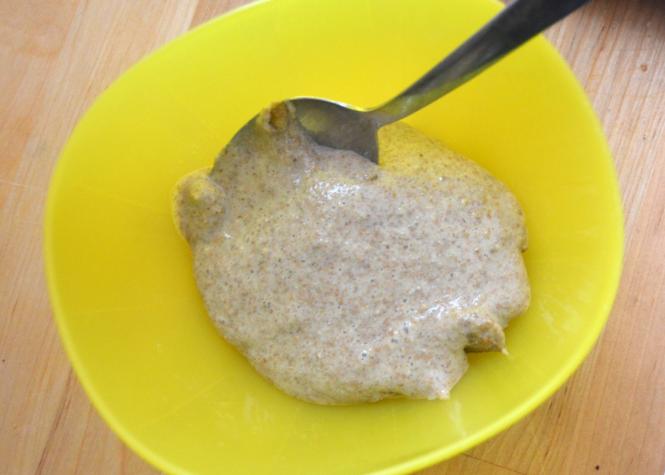
The mixture looked like a thick paste…nothing like any of the bubbly, crazy-looking starters I’d seen pictures of. Could this jar of “flour paste” really transform itself into something living? I covered the jar with clean cheesecloth and secured it with a rubber band. The final thing I had to do was find a reasonably warm spot in my kitchen for my jar to sit for the next 24 hours. I chose the top of our fridge, which usually stays fairly warm. Apparently that was all I had to do—could it really be that easy?
Day two: My starter looked…the same as the day before. Still like a flour paste, just a little more crusty on the top. No bubbles, interesting smells, or other signs of life or fermentation. Nevertheless, I was committed now, so I continued with the next step in the creation of my starter, which was its first feeding, 24 hours after I first made it. Starters really are like pets or children…they require real attention and love to thrive. You really have to feed them so the yeasts and bacteria have food to consume.
So I have mentioned “feeding” my sourdough starter a few times now, but what is “feeding”? Like I said, getting a starter going and maintaining it takes a bit of work and commitment—these feedings are the reason. The organisms in the starter culture need nourishment to stay alive and proliferate, just like any other living thing. The process of feeding a culture basically means you add additional flour and water to ensure the bacteria and yeasts have plenty of starch and nutrients to feed on. Every time you feed your culture, you also need to toss out about half of the existing mixture, mostly because if you just kept adding and adding flour and water to your starter, the starter would get huge, which you don’t need or want.
To feed the starter the first time:
1. Weigh the jar, containing 100g of starter. The weight of the jar + the starter should now equal the weight of the empty jar (which I wrote on the bottom of the jar so I could remember) + 100g, or about 347g in my case.
2. Discard 50g of starter from the first day (leaving 50g of the original remaining, leaving the weight of the jar + the starter right around 300g).
3. Then, add an additional 50g water + 50g rye flour right into the jar with the remaining starter. I mixed this thoroughly with the original and replaced the cover.
I placed it back on top of the fridge…but this time only for 12 hours. I was to do this same feeding thing every 12 hours from now on…or something. Now it seemed like work! And I was still skeptical this whole thing was going to work out…
Day three: Same. Thing. This is the point at which I was starting to get a little discouraged…there still weren’t any bubbles. Did it smell a little different? A little vinegary? Ahh, it was probably just my imagination. But I fed it anyway! Twice. Sigh. Hopefully tomorrow, I thought. Luckily I’m a perpetually (and sometimes foolishly) optimistic and hopeful person. And I tend to be stubborn. I wasn’t giving up yet! Did I mention I’m stubborn?
To feed the starter every time after the first time:
1. Weigh the jar, now containing 150g of starter. The weight of the jar + the starter should now equal the weight of the empty jar (which I wrote on the bottom of the jar so I could remember) + 150g, or about 397g in my case.
2. Discard 100g of starter (leaving 50g remaining, leaving the weight of the jar + the starter right around 300g).
3. Then, add an additional 50g water + 50g rye flour right into the jar with the remaining starter. I mixed this thoroughly with the original and replaced the cover.
 The starter, with air bubblesDay four: I reluctantly returned to the kitchen to check my
starter and (yawn)…wait. OH MY GOODNESS, BUBBLES! My jar of flour-paste had
inflated to twice its previous size and there were little air bubbles
everywhere! I couldn’t believe it…SUCCESS! SO MUCH EXCITEMENT. This may seem
like a rather outrageous reaction, but it was really cool! And it was really happening! I was instantly
several times more enthusiastic about feeding and growing my starter, now that
it really was alive and working. I had captured the wild yeasts…and would now
be able to put them to work for all my bread-making endeavors, provided I could
figure out how . I fed the starter again and returned it to its cozy little
perch on the fridge, now much more confident in my ability to trap wild yeasts
and also to write this article.
The starter, with air bubblesDay four: I reluctantly returned to the kitchen to check my
starter and (yawn)…wait. OH MY GOODNESS, BUBBLES! My jar of flour-paste had
inflated to twice its previous size and there were little air bubbles
everywhere! I couldn’t believe it…SUCCESS! SO MUCH EXCITEMENT. This may seem
like a rather outrageous reaction, but it was really cool! And it was really happening! I was instantly
several times more enthusiastic about feeding and growing my starter, now that
it really was alive and working. I had captured the wild yeasts…and would now
be able to put them to work for all my bread-making endeavors, provided I could
figure out how . I fed the starter again and returned it to its cozy little
perch on the fridge, now much more confident in my ability to trap wild yeasts
and also to write this article.
Since day four (the first sign of life in my starter) I have been continuing to feed my starter twice a day, every 12 hours, and have observed that it has established a schedule of puffing up a few hours after it has been fed and then falling later on. Apparently the starter falls when the bacteria in the culture have eaten all of the sugars/nutrients from the flour — this is not a problem, it just means that the starter needs to be fed again. It’s crazy though, how this all works — it’s almost like the thing has a personality. Weird…and awesome! My starter also smells nice and sour — not bad, just kind of pleasantly vinegary, like it is obvious that fermentation is happening. All good things!
So now that I have created a starter that is alive and active (!), the next thing to do is, of course, use it to make bread. Apparently it is best to wait until the starter is at least 9 days old, because as your starter gets older, it gets stronger and more reliable, thus making it more reliable when it comes to raising your dough…an essential part of bread making, of course. As starter cultures mature, they also continue to develop complexity and come to have their own unique flavor identity (turns out they really do have their own personalities), which is another great reason to be patient with this whole process. So bread will be up next – here’s to hoping my starter really is as awesome as I seem to think it is.
That’s it for now — so I’ll be feeding my starter and geeking out about its regular schedule of rising and falling until it’s ready to be used for bread, hopefully in a few days. I’ll report back next week.

Jillian Tholen learned to love food at a very young age growing up on her family's farm in Southwest Minnesota. She moved to Minneapolis after finishing undergrad to study Nutrition, and since finishing her Master's has been continuing to work with food and the community of the Twin Cities. Despite being a "country girl," she adores living in the Twin Cities, loves her summer job at the Mill City Farmer's Market, and is always up for feeding people and having a bonfire. Jillian also sells running shoes at Run N Fun and serves farm-to-table food at the lovely Birchwood Cafe. Her most recent non-sourdough article for us was Wellness Wednesdays at the Linden Hills Co-op.