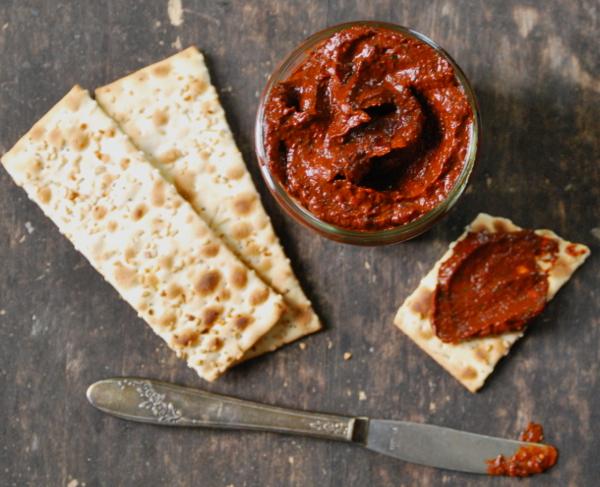
If you’ve spent much time reading food blogs or magazines, you probably know what harissa is, but for those of you that don’t (hi Dad!), let me fill you in.
Harissa is a North African condiment made mostly from peppers and spices. And it is amazing. Like, a punch-of-flavor-to-your-tongue amazing. It’s often found on Moroccan tagines, but I’ve found so many more day-to-day uses for it. I love to slather it on sandwiches. Try it on meatloaf with a bit of mayonnaise and some hot peppers. Heavenly. It’s also fantastic on an egg sandwich where the yolk is still a bit oozy. Crunchy salads, or paired with carrots — harissa transforms an ordinary meal into something divine.
Readers of my blog, Relishing It, know that I love to make my own condiments. It’s not difficult, and to be honest, they just taste better than those bottled versions that are mass manufactured and sit on the shelf for months. Mustard, ketchup, and red curry paste are a few of my favorites.

Harissa isn’t quite so common, but there really are a ton of recipes out there, and they are all a bit different. Some use tomatoes, some don’t. Some use fresh herbs, others stick with dried spices. For this harissa, I was looking for something a bit smoky, but not too spicy. I also wanted it to have a fresh, herb flavor. If you want more of a kick, you can simply add more cayenne pepper or choose a hotter variety of dried peppers for the base.
One nice thing about this recipe is that you can easily manipulate it to suit your own tastes. For my part, I think this one turned out perfectly, so I won’t be changing a thing. Top your harissa with a bit of olive oil to store in the refrigerator for an extended period of time, it should last a few months this way. But...it won’t. You’ll eat it up in no time. It’s that good. Hope you enjoy!

Homemade Harissa
(Makes about 1 cup)
5 dried Ancho chile peppers
5 dried Guajillo chile peppers
3 cloves garlic, chopped
1 teaspoon cumin seed, toasted and ground with a mortar and pestle (or use the flat side of a large knife to smash them)
1 teaspoon coriander seed, toasted and ground with a mortar and pestle
2 teaspoons fresh lemon juice
2 tablespoons fresh parsley, chopped
2 tablespoons fresh cilantro, chopped
pinch of ground cayenne pepper, more to taste
3 tablespoons extra virgin olive oil
3 tablespoons champagne vinegar (white or red wine vinegar will also work)
1 tablespoon tomato paste
sea salt, cracked black pepper, to taste
3 tablespoons soaking liquid, or more, if needed
Place the dried peppers into a medium sized bowl. Pour enough boiling water over them so they are covered. Place a small plate on top of them to keep them submerged. Cover the entire bowl with another larger plate, to keep the heat in. Let sit for 1 hour.
When the peppers are soft, begin by reserving some of the soaking liquid. Remove the peppers from the water. Remove the stem and carefully dump out the seeds. Place the peppers and the remaining ingredients into a food processor. Process for a few minutes until completely smooth. Taste. Adjust seasonings and thickness, if necessary.
Store in a jar with a lid in the refrigerator. Cover with a layer of olive oil, if intending to keep for an extended period of time (several months). I don’t cover mine with olive oil, but I generally use it within a few weeks. Enjoy the heck out of this!
 Laurie Jesch-Kulseth is a lifelong home cook who has always believed that eating healthy food is an important part of a balanced life. A wife and mother of two, she pours her heart into the meals she makes for her family. She photographs and writes about it all on her blog, Relishing It, where a version of this story first appeared.

