Starting a new project begins with great, lofty imaginings…in this case, the vision is of a perfect garden. Then the unanticipated variables creep in. The straw bale garden has triggered a few surprises, some serendipitous, some not. As a follow up to Part 1 of this series, I’ll share in this report on this planting, watering and watching a straw bale garden grow.
The bale set-up was actually a thrill. Maybe it’s an unfulfilled interest in engineering, but I really enjoyed the challenge of locating and grouping the bales in full sun, amongst a system of north-south lines between posts that I drove into the ground myself with a post pounder. I enjoyed stringing an espalier wire system (trellis) between the posts, as I imagined great climbing cucumbers, beans and tomatoes.
When the bale conditioning was done and early May rolled around, the planting also was fun. No deep knee bends. No shins caked with dirt. No worry about compacting the soil. The straw bales top out at nearly two feet above ground, so they are ergonomically better even than raised beds for the gardener’s comfort while planting, watering, maintaining and harvesting.
Pre-Planting: experimenting with a couple spare hay bales
Motivated by the set-up process, I couldn’t wait for the conditioning to be over, so decided to experiment with a couple “naturally preconditioned” bales of horse hay I’d used to help insulate my beehives over the winter. (Note: Most hay contains lots of seeds that threaten to become weeds. It also lacks straw’s ideal moisture-holding hollow stems. However, horse hay falls halfway between 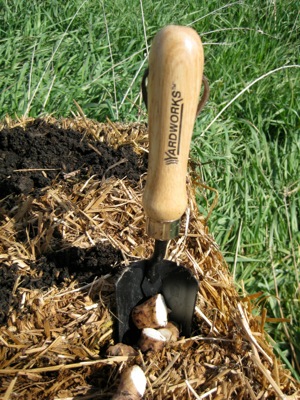 Preparing to plant wild potatoes.cattle hay and straw: it is mainly hollow-stemmed grasses without lots of seedy plants.) So just as an experiment, I used the breaking-down bee bales to get a head start at planting.
With a trowel, I wedged deep openings and dropped in 4 or 5 sprouting eyes of some old sprouting gold potatoes. Then filled each hole with organic soil. Also dropped in some sections of wild potatoes, something I’d never seen before and picked at a farmer’s market in San Francisco. To date, a few hills of Golds have emerged and look pretty happy to be nestled into hay bales.
Planting: straw bales conditioned and ready
When my bales were fully conditioned (see Straw Bale Gardening: Part 1) the straw was nicely decomposing, its stiffness softened and easy to plunge a trowel into. So, it was time to treat myself to a trip to Seed Savers, just north of Decorah, for some heirloom plants. Tomatoes and peppers are my favorite homegrown vegetables. After choosing from so many beautiful and unusual varieties, I am inspired to try and make it to Seed Savers’ famous late summer tomato tasting.
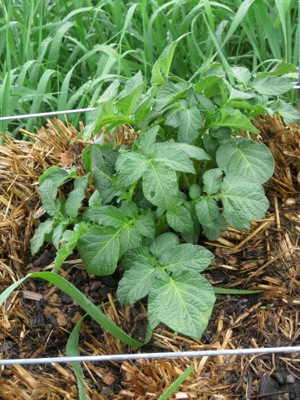 Yukon golds
To plant my starts, I scooped trowel-fulls of soil into each planting spot, gauging three tomatoes per bale or five pepper plants or a checkerboard of offset patches of greens and cucumbers. Carrots, beets and beans I planted in straight, close-together rows. I made sure to save a little leftover straw bale so I could add plants from Lanesboro Farmer’s Market. And I’ll plan to replace early lettuces with cold-hardy kale and arugula later in the season.
A couple humbling planting points I learned that will promise a better straw bale garden next year:
- Use a light potting mix, not the rich, dense composted soil which cakes and hardens as it dries out, making it hard for tiny sprouts to erupt.
- Don’t confuse bush beans with climbing beans. I was pleased to recall from childhood my mom
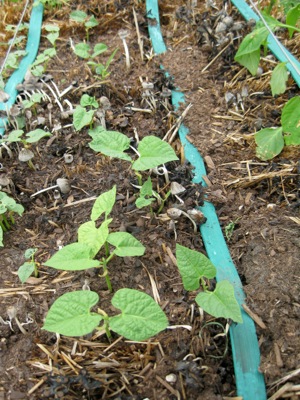 Beans...and some mushrooms. soaked the bean seeds to help them sprout sooner. So the beans came up in three days! But I had to plant a second row when I realized the first planting was actually the short bushy variety – not the climbers that would actually use the trellis wires I’d set up for them. I enjoy pickled string beans and have practiced two years now to put up bean pickles that don’t shrink and wrinkle due to too strong a vinegar mix. This year, I’ll have extras to practice getting the juiciness right.
- Don’t fertilize new tomato plants. While testing out an original Rhubarb-Stinging Nettle recipe for the Rhubarb Festival’s tasting attraction, I ended up with a lot of nettles stems and scraps. So I brewed up some of that great natural fertilizing tea that fermenting nettles are famous for. Maybe the tea was a bit strong. The result: my young heirloom transplants yellowed -- from the overdose of nitrogen that their root systems weren’t mature enough to handle? Maybe a wise gardener reading this could better explain. Please comment if so.
Watering: keeping the bales moist.
The plan was to set up a fully automatic system on a timer that could function on its own – especially when I need to be away for a few days. No dragging out hoses. No standing over plants, watering each and every one. So I dedicated a few hoses to the project, buried one that crosses the mowed lawn, added splitters with switch valves that allow me to water new fruit trees planted along my approach to the straw bale site: a bonus that bodes well for a bounty of future fruit.
A second hose splitter junction near the straw bales lets me automatically or manually trigger the soaker hose. The soaker is buried across a mowed area surrounding the bales, then snakes up and down each row of bales. The buried segments of the hose were neatly duct taped to minimize water waste.
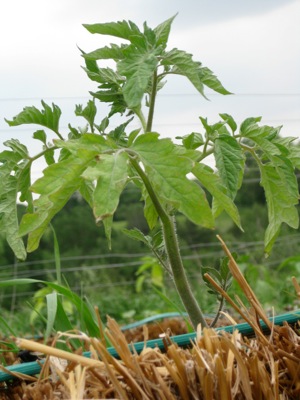 Heirloom tomatoesThere seems to be a learning curve to getting the soaker hose right. It’s a mystery how much water is delivered and whether that water reaches the plants’ roots. How effective is the duct tape, really, in blocking segments of the soaker hose? In the meantime, I enjoy hand-watering and inspecting the garden close-up each morning. When I have to be out-of-town, I’ll take my chances with the automatic backup.
Another bonus. Since the straw bale garden is on the way to our chicken coop and on the way back from the horse barn, it’s kind of fun to add a stop along the way as my husband and I make the rounds each morning and evening to watch our vegetables growing and enjoy knowing we’re a little more in control of what we eat.
It’s too early to tell whether this gardening method will yield that perfect garden I began to imagine in that Straw Bale Gardening class. But since it’s all just a fun experiment, I keep in mind that the worst that can happen is that I am left with nothing but some good compost (composted straw makes good, clean, rich, weed-free soil that could easily translate into a healthy, chemical-free, nutrient-rich raised-bed garden in any future year.) Either way, it’s a win – and a curious new spin for putting vegetables on the table.
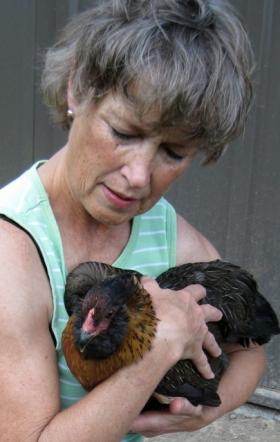 Kitty Baker grew up on a mixed ag farm, then in a small town, near Rochester, MN. She and husband Keith raised two daughters, living in Kansas City and Minneapolis. A professional writer, Kitty enjoys topics of lifestyle and food, especially since 1999, when they bought a farm, Root River Wilds, just north of Lanesboro, MN. The farm’s spectacularly varied acreage -- bluffs and woods, pastures and restored prairies cut with trails and wrapped in the oxbow of the North Branch of the Root River -- is rich with opportunities to discover and share ways to live abundantly. Her last article for SGT was: Straw Bale Gardening, Part 1


